Creating a private YouTube channel is not that difficult. In this post, we explain how to create a new private YouTube channel or make an existing public YouTube channel private, step by step.
We all know that YouTube is not just a video hosting site but also a good monetization method. So, some of you may be wondering why you should start a private YouTube channel.
Videos uploaded to a private channel cannot be viewed by anyone without your invitation. Therefore, there is no income from advertising.
So why are you thinking of starting a private YouTube channel?
There can be many reasons for that. Some of them are,
- To share your private videos with loved ones
- To back up your favorite videos
- To store videos for internal training purposes
- To build a private community of friends and family
- To conduct a test run before the public launch
- To avoid copyright issues
Whatever the reasons, YouTube lets you make your entire channel private or keep only selected videos private. Let us check how we can do this.
How to Create a Private YouTube Channel (2026 Guide)
- Visit YouTube and tap Sign in.
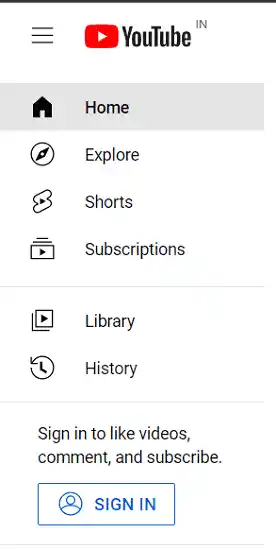
Enter your Gmail credentials to log in.
2. After successful sign-in, you will be directed to the YouTube homepage. Click your profile picture in the top-right corner to view settings.

Select the Create a channel option.
3. A pop-up box will appear like this,

Enter a name for your channel. Upload a picture if required. Then, click on the Create channel option.
Wait for a few moments. Finally, it will redirect you to the channel dashboard.
4. Open Settings from the left sidebar.

A box will appear with options to add channel keywords, add and manage users, and even delete your YouTube channel.
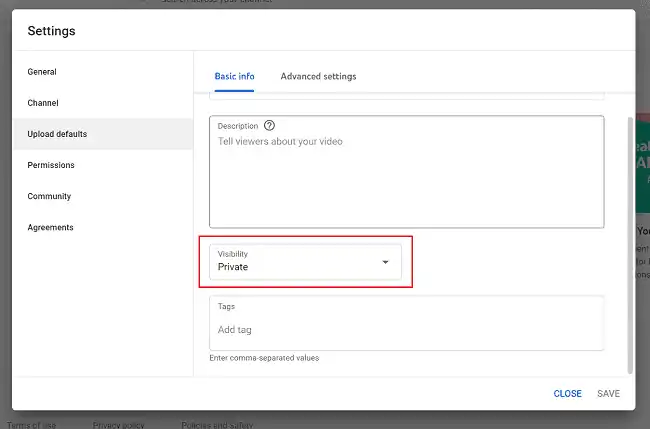
Visit the ‘Upload defaults’ menu. You can set default titles, descriptions, and tags for all videos in this section. Click ‘Visibility’ and select ‘Private’ from the list.
What does it mean?
Thereafter, all videos uploaded to this channel will be shared privately. That means no one can see them without your invitation. But you can change the status at any time and upload them publicly if needed.
That’s it.
I created a private YouTube channel for writing this post and uploaded 4 videos as private.

As you can see, private videos are not showing in the channel feed or anywhere else on YouTube. They can be seen only by channel invitees.
In the following sections, you will learn how to add invites and how to share private videos on YouTube.
How to Upload a Private Video on YouTube?
1. Sign in to your YouTube channel. Click ‘Upload video’ from the main screen to upload your first video.
A box will overlay your screen. Click ‘Select files’ to connect you to the local drive and upload a file.
A simple step-by-step wizard will open to assign a title and description to your video. Click on Next to go to the next step. Finally, you will see an option to manage visibility.

Select Private. So only you and your invitees can watch your videos. No one can watch it even though they got your private video link. On the other hand, anyone can watch an unlisted video with a link. That is the main difference between private and unlisted YouTube videos.
Private videos won’t appear in YouTube search results, related video sections, or feeds. People, including the channel owner, can comment on those videos as well.
Save changes.
How to Share a Private Video on YouTube?
- Sign in to your YouTube channel first.
- Visit Your Videos from the left sidebar.

It will automatically connect you to YouTube Studio, where you can edit and manage uploaded videos.
3. Click on Private (under Visibility) to share a video with specific people.

Select ‘Share privately’.
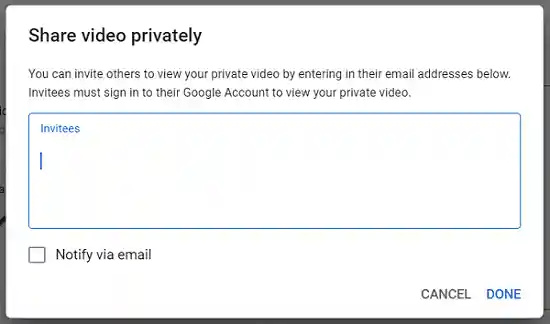
Enter email addresses with whom you want to share this private video. Finally, check the ‘Notify via email’ box and Done.
Your private video is successfully shared with the selected people.
Looking for more YouTube-related articles? Check the following,
- How to Create a YouTube Music Playlist
- How to Delete Google Search History Permanently
- How to Delete YouTube History